Looking for a way to preserve your wooden fence posts? If so, you’ve come to the right place. In this article, I’ll show you how to get the most out of your timber fence posts, from prepping them to applying a quality finish. I’ve treated wooden fences for years, so I know how to protect fence posts from moisture, rot, and insects. Read on for an innovative way to preserve your timber fence posts.
Preparation is the first step to timber fence longevity. Before treating, each post should be cleaned. Use a pressure washer or a brush and detergent-filled bucket. After cleaning, seal any cracks or gaps between boards that could let moisture or insects into the wood because you don’t want to keep searching for a timber fencing contractor near me every few years.
Finally, paint, stain, or sealer, depending on personal preference, will protect your fence posts from weather and pests. These treatments should last several years without reapplication if applied properly, but annual inspections are still recommended to keep everything in top condition. Discover more on how to treat timber fence posts in this insightful article.
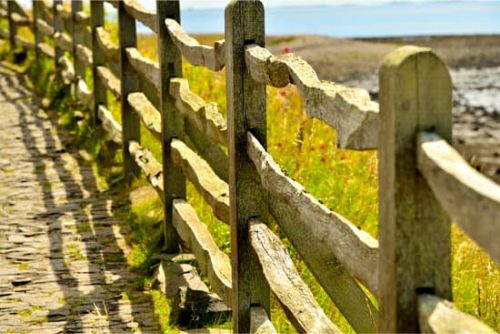
Any fence needs posts. They stabilize fence panels, pickets, rails, and other components. Thus, durable and long-lasting materials are essential. Pressure-treated wood prevents rot and insect damage, so farmers recommend it for fence posts. Properly maintained, pressure-treated wood can last 25 years.
For a sturdy fence post structure, choose a durable wood. Cedar and redwood are most decay-resistant, so most people choose them. Some composite materials may be suitable for added strength or weather protection.
Wooden fence post systems require saws, drills, hammers, nails, and screws. When nailing planks together, use the right hardware for maximum security and moisture resistance. Sealing exposed surfaces keeps rainwater out and prolongs fence posts.
Wood types for timber fence posts vary. Choose a wood that can withstand any weather to ensure your fence lasts. I’ll tell you about the different treated-wood fencing options so you can choose the best one.
Pressure-treated lumber is the most common fence wood. Pressure-treating wood makes it insect- and moisture-resistant by injecting chemicals under pressure. For long-lasting fence posts, pressure-treated wood is ideal. This method does not prevent rot or decay, so seal any exposed areas, such as cuts or holes made during installation.
Cedarwood, with its unique oils and resins, resists insects and rot. Cedar’s natural colour adds beauty to any yard or garden. Cedar posts are more expensive than other woods, but they last longer.
Weather and climate conditions will determine the best treatment method for wooden fence posts. Knowing this before buying materials ensures your investment will last for years.
How to treat timber fence posts? Selecting a wood treatment method can be difficult. There are many options, but choosing poorly could damage your fence posts. Three popular wood fence post treatments are:
After installing the wood fence posts, I’ll coat them. This prevents moisture and wood rot. First, I smooth each post with fine-grit sandpaper to remove splinters and rough edges. Next, I brush or roll on a treated wood fence post-specific exterior sealer or paint.
Finally, even if I have to climb a ladder, I check every detail on the posts. My fence posts are weatherproof after a thick coat of sealant. These steps prepared my fence for a moisture barrier.
After coating our timber fence posts, we need to add moisture protection. A moisture barrier prevents wood rot. Here are some steps you can take to protect your wooden post:
These easy steps can protect your wooden posts from moisture-induced decay. After these precautions, your fence posts will last for years. This protection leaves only preparing the base and top of each post for installation, which we’ll cover next.
I had to prepare my timber fence post before installing it. First, I had to secure and level the post base. I secured the post with concrete posts and an end vice on both sides. After preparing the base, the post was placed.
I dug a hole slightly larger than the post’s diameter. I filled three-quarters of the hole with gravel before inserting the post and supporting it with soil or gravel. I then leveled the dirt side-to-side and back-and-forth until it was even. Finally, I added soil or gravel to prevent rainwater from seeping into the post’s bottom.
After these steps, it was time to paint or seal the top of the post. This prevents moisture from rotting wood. These simple steps will help your new fence last longer.
Farmers need wooden fence posts. Unfortunately, weather and other factors can rot these posts. Preserve or paint wooden fence posts to prevent decay. They will live longer and look better.
Creosote-based products treat wooden fence posts. These products prevent decay while letting wood breathe. Water-soluble treatments like copper naphthenate or zinc dihydroxide prevent moisture and fungal growth on exposed surfaces. Finally, acrylic or polyurethane sealers can protect and beautify.
To get the most out of your fence post treatment, be careful and follow the manufacturer’s instructions. Properly preparing and treating wooden posts can give your fences years of beauty and stability. Let’s examine the pros and cons of post-treatment.
Treating wood fence posts prevents rot and insects. It can also protect your posts from insects for years. It also makes posts last for years. However, treating your posts differently has pros and cons.
First, treating lumber increases its durability. Preservative-treated posts are more weatherproof than untreated lumber. They will be more resistant to wet conditions, extreme temperatures, pests, and other environmental factors that could cause deterioration. Due to less rotting and warping, treated lumber requires less maintenance.
Due to the chemicals used to make them, treated posts may cost more upfront. If improperly handled or stored during installation, these treatments’ chemicals may leak into nearby soils and groundwater. Finally, many worry about treatment-related health risks. Therefore, before installing products near living spaces or children’s play areas, research them thoroughly.
To make the best decision for your project and budget, weigh the pros and cons of treating your timber fence posts. With this knowledge, you can create a safe and effective post-treatment schedule.
Treating my wooden fence posts is crucial. Wood decay can ruin your fence if it is not treated. I made a timeline to treat my wooden posts properly.
I review my posts every six months. This lets me catch issues early and fix them. I also clean up the post and check for rot and insect damage.
Treating posts follows. Sanding the posts smooth removes all surface coatings before continuing. Applying the protective coating is fun. Oil-based or waterborne preservatives will depend on my needs. I usually need two coats for oil-based products and three for waterborne ones.
My posts will soon be fresh and ready for Mother Nature. My fences should last a lifetime with regular checks and proper maintenance. secure, and attractively border my property.
To ensure your wooden fence lasts for years, you must identify treated fence posts, which can be difficult. Check the posts for rot or decay first. These indicate an untreated post that may need replacement. Discoloration may indicate that water has weakened the wood. Finally, use concrete around the post’s base to protect it if you’re not sure if it’s treated.
After identifying which posts need treatment, choose the right treatment for your project. Today, there are many types, each with pros and cons. Careful consideration and research into which type will provide long-term protection without damaging your timber or budget are needed to choose one. Your new fence will look great and last for years if you choose the right treatment.
Fence post treatments are numerous. Wood type and project goals determine the best treatment. When protecting posts from rot, pests, and other damage, consider a few factors.
To prevent wood decay, choose chemically treated posts. Pressure-treated lumber and organic treatments like boreate, oil, and wax are examples. Before installation, seal untreated wood. Make sure the post’s fasteners don’t contain corrosive metals like iron or zinc.
Next, consider where you’re installing the posts and how they’ll weather. Marine-grade finishes are recommended for projects near salty oceans. Understanding all environmental factors helps you choose the best protection for each situation for long-term success.
Finally, consult with home improvement store experts to make the best choice for your needs and budget. They should be able to recommend materials and climate-specific solutions. With their knowledge of wood types and treatments, they can provide advice that balances safety and performance for optimal results at a low cost.
My post wood choice is crucial when building a fence. I chose treated wood after doing my research. Treated posts are durable and can prevent dry rot and other moisture damage. My new fence will withstand rain and snow.
Treatment also slows post-decay. My fence will last longer if I use pressure-treated wood. These posts are worth the extra money due to their durability and protection.
Treated timber posts are easier to maintain than non-treated wood because they need less painting or staining. As a bonus, I don’t have to treat the wood myself, saving me time and energy. If you were also to have
Treating timber fence posts improperly can pose risks. Planning a fence project requires knowing the risks. Wood-treating hazards include:
In addition, improper installation can rot or damage the untreated wood around the treated post. Wire ends instead of screws and nails on a post can create pressure points where water collects and rots the wood. Installing your fence properly prevents this, ensuring your posts last for years. With these tips, you can safely treat fence posts without endangering yourself or others.
Cost matters when treating timber fence posts. The cost of replacing and maintaining posts can be difficult to estimate. There are inexpensive ways to extend the life of posts. Installing your fence properly reduces costs. Before digging or hammering, measure and mark each post. Installing posts will be faster.
Quality installation materials and tools are the second way to extend the life of your fence while reducing costs. Good-quality components and equipment cost more up front, but they last longer and require less replacement.
Finally, check fence posts regularly for decay or damage so they can be repaired quickly. Preventive maintenance reduces long-term repair costs. These steps ensure that my fence posts will last for years with minimal maintenance, saving me time and money.
To keep costs down and preserve the environment for future generations, treating timber fence posts must be considered environmentally friendly.
After discussing fence post treatment costs, let’s discuss its environmental impact. Chemically treating timber posts can prevent rot and insect damage, but it harms the environment.
Creosote, made from coal tar, is the most common chemical used in treated timber posts. Its high toxicity raises concerns about soil and water contamination. Creosote releases hydrocarbon gases that pollute the air. Chromated copper arsenate (CCA), another toxic chemical, should be avoided.
Fortunately, non-toxic plant extract preservatives like borates are now available. These products protect against rot and insects without harmful chemicals. These treatments also last longer than traditional methods, making them ideal for wood fence owners who want to maximise their investment without compromising safety or sustainability.
Treating timber fence posts safely and properly is crucial. To do this, you need to know the best fence post wood and how often to treat it. With the right knowledge and tools, you can make your posts last and look great.
Treating timber fence posts with a pressure washer, brush, or roller doesn’t take much time either. These methods are cheaper and faster than sanding and repainting my fence posts every few years.
Maintaining timber fence posts will extend their lifespan and keep them looking good. By knowing which woods are best for outdoor use, choosing an appropriate treatment method, and following safety protocols, you can have beautiful wooden fences around your property without much maintenance. After reading this article, you have learned how to treat timber fence posts in the most effective way.
I’m often asked how often to treat timber fence posts. Treating them regularly prevents rot and preserves your fence investment. To prevent wood damage and discoloration, you must know what treatment to use.
To begin, learn about the different wood fence treatments. Oil-based and water-based treatments are the main types. Oil-based treatments are more moisture-resistant but require more frequent application. Water-based treatments are simpler to use but offer less moisture protection.
Regular maintenance is essential for fence post performance and longevity, regardless of treatment. Repair any rotting or cracking before applying a new treatment. Your local weather may require a new treatment once or twice a year. Before starting, read all instructions.
Proper care will extend the life of your fence posts, so take your time when choosing a product and maintaining it. Preventing costly repairs or replacements due to neglect now can save you money later.
When building a fence, choosing wood for fence posts is crucial. Choosing the right wood for a new or replacement fence can ensure its longevity. This article will discuss the best woods for timber fence posts.
Pressure-treated pine could work. Chemical preservatives protect this wood from water and other elements. Pressure-treated pine is cheap and durable. It doesn’t need painting or staining because it’s preservative-treated.
Cedar works too. Due to its high oil content, cedar is ideal for outdoor fencing because it resists moisture and insects. Its beauty makes it a popular choice for homeowners seeking kerb appeal. Cedar is more expensive than other woods, so if cost is a concern, another option may be better.
Proper installation ensures your fence post will last through all weather conditions, regardless of wood type. Before starting any project, consider aesthetics and durability when choosing the material for fence posts.
Fence post treatment requires safety precautions. Wood can be dangerous if handled improperly. I check my safety gear before starting. This job requires gloves, glasses, and long-sleeved shirts. Emergency first-aid kits are also essential.
Next, I clear the area around my workstation to avoid interruptions. Before using your tools, double-check them to avoid accidents. Finally, ventilate. Open windows and doors for airflow during treatment.
These simple steps will keep you safe throughout the process. No matter what wood you use for fence posts, it’s important to wear protective gear and take other precautions when working with chemicals or tools to avoid serious injury.
Treating fence posts takes time. To minimise damage and time, finish the job quickly. What’s the fastest fence post treatment?
Timber fence posts should be impregnated. Before installing, soak the post in preservative. Impregnation protects wood from moisture, rot, fungi, and pests. After soaking, secure the post and let it dry. Water or rain on the treated post will cause further damage.
Paint or stain the post directly after installation. This prevents moisture and weathering. Paint can peel off in harsh conditions like sunlight or heavy rain, so this method may not provide as much long-term protection as impregnation. For maximum durability, I recommend impregnation followed by a protective coating.
Both methods protect fence posts, but an impregnated treatment followed by painting or staining will last longer.
I’m considering pressure-washing my wooden fence posts. Pressure washing fence posts is one of the fastest and most effective methods. I’ve learned some important pressure washing wood tips:
Pressure washers are fast, efficient, and produce great results. Anyone can do it with a good pressure washer and some basic knowledge. If you choose the right nozzle setting and work slowly from the bottom up, you won’t damage the wood. Never forget to wear safety gear when using a high-pressure sprayer. Overall, pressure washing timber fence posts may work for your needs, but be careful.