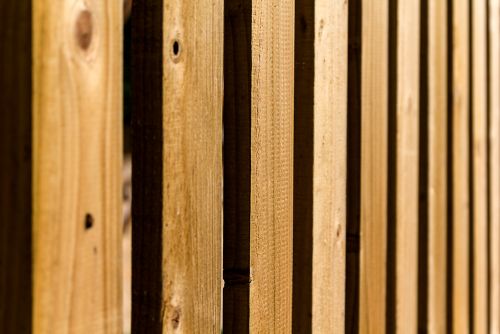
Want a beautiful backyard fence? Fences frame our homes and add value and kerb appeal. Timber fencing is affordable and creative. I’ll show you how to build a beautiful wooden fence today.
A custom wooden fence is ideal if you want something unique and attractive. Anyone with basic DIY skills can build a beautiful, long-lasting timber structure with a few tools and materials. With time, patience, and creativity, it’s easy.
I’ll take you from design to post-installation in this article. You’ll learn about quality lumber and hardware, project treatments, and finishes. You can build a stunning timber fence by following my simple instructions. Discover how to build a timber fence by reading this insightful article. Building a timber fence requires gathering materials and tools, preparing the site, installing posts and rails, and securely attaching the boards.
Building a timber fence excites me. It’s not as complicated as it seems, and I can do most of it myself with some help from friends or family.
Before building my wood fence, I must plan my design. After this, I can buy enough lumber, nails, screws, and other building materials. With these materials, I can start preparing my construction site by flattening uneven surfaces and laying gravel or concrete blocks at each post hole.
After that, I’ll be ready to set up my fence posts, cross beams, and railings, depending on my timber fencing design. Finally, securing planks or panels across sections with strong fasteners turns my backyard into an attractive outdoor living space with a boundary. Let’s examine the materials needed to begin…
Now that I have a project overview, I can gather the materials and tools to build a timber fence. Fence rails, timber posts, string line, hammers, and nails or screws—depending on the type of fencing—are needed to build a strong fence.
First, measure the fence’s location so you can order enough materials. Next, design your fence, including how many rails per post and how high each section should be. After measuring and designing, I bought all the materials.
I built my fence after gathering everything. I built a sturdy fence without any issues with careful planning and preparation.
Preparing the fence site is essential. I measured the area I wanted to fence and marked it with string or stakes. Next, I had to dig two-foot-deep post holes along my boundary line. After that, I started my wood-post fence.
To secure the posts, I filled each hole with concrete. While on the concrete set, I gathered boards, nails, drills, and saws for my timber fence. Before building my fence posts, I smoothed the post hole edges with sandpaper. This leveled everything and provided a solid foundation for my new fence.
I’ll demonstrate fence post construction next. Set the posts first. I must measure and mark each post’s location. I can then dig each hole and fill it with concrete or soil before securing the posts. After they’re secure, I’ll attach the rails.
For a uniform fence, I’ll start by measuring post distances. If I want five posts on my fence, I’ll divide the total length into five sections and make sure each post has an equal amount of space. Digging follows. I may need to bury my posts differently depending on their material, such as wood or metal.
After securing my posts, I can add the rails that support everything. This requires aligning each rail with its corresponding post before screwing or nailing them together. These connections must be strong to avoid issues when installing fence panels or gates. This is one of the most important steps on how to build a timber fence.
Installing timber fence rails is next. I have a free ladder and enough screws to build a wooden fence. First, mark a pencil distance between each post. The rail will go between these posts. Next, level your drill bit in the post’s pilot hole. Screw the rail to the post with your free lumber. To ensure stability when installing panels, secure them tightly. Finally, repeat this process for all posts to secure all rails. After installing my rails, I’ll attach my fence panels and finish my DIY project.
After measuring and cutting the fence posts, I’ll attach the panels. I’ll need a drill-bit-attached battery pack. After installing my quality fence posts, I can start measuring my timber fence’s height. Before attaching, level each panel.
Sealing and securing board gaps comes next. This protects against wind and weather damage. It enhances property security. A tidy product looks great too.
After constructing a timber fence, we can finish our project. We can add professional touches to our wood fences depending on your budget and fence type.
Measure the fence first to ensure all pieces fit. For neatness, we want each fence piece to be even. To fix an uneven picket fence, adjust posts or recut boards.
Stain or paint our wood fences to improve their appearance. This prevents weather damage and enhances wood color. High-quality paint or stain could extend the life of your new wooden fencing.
We finished building and customizing our timber fence with these steps. Let’s add DIY tips for a professional look.
We all want a sleek, professional fence. This takes time and effort. First, choose your fence’s height and style, which may depend on its purpose—garden or boundary? After these decisions, build.
Materials must match your style and purpose. Timber’s strength and versatility make it a good choice for durability. Construction costs are lower than with brick or stone. Before cutting wood, measure carefully to ensure a perfect fit.
Final touches like gate fixtures and post caps can make a big difference in aesthetics. With careful consideration of design elements like color palettes and textures, quality materials, and minimal effort, you can create an attractive yet functional fence. Remember that cutting corners could cost you later.
After planning your timber fence, consider the cost. Fencing requires materials, tools, and expertise, all of which cost money. Include these in your fence budget.
Quality materials are crucial when building a timber fence. This will help your fence last longer and save money on maintenance and repairs. To ensure a great finish, consider labour costs and any extras like paint or sealant.
Finally, some municipalities require permits or fees before installing a fence. Check local laws before building your dream timber fence to avoid unexpected costs. With this knowledge, you’ll be ready for anything—including maintaining and repairing your investment over its lifetime.
Maintaining and repairing a wooden fence keeps it looking good. I knew I had to maintain my high cedar plank fence around my property to keep it looking good. Since a privacy fence’s wood will weather, it’s crucial.
I check my wooden fence every month or two for damage or decay. Caulk fills cracks and replaces rotten boards. That way, I can spot issues before they escalate. Stain or paint protects my fence from moisture and other environmental factors and keeps it looking new.
Just make sure you do regular inspections and fix any issues so you can enjoy years of a beautiful timber fence. Let’s see how alternative designs and materials can improve our home DIY projects.
I’m considering other timber fence designs and materials. Smart doors and free XGTI are available to build the fence. One of these might speed up fence installation. I considered metal fencing but wasn’t sure how it would match my house’s architecture. I found online that metal fences last longer than wooden fences, so it may be worth investigating.
I discovered that different types of wood cost different amounts when building a fence. Cedar is popular because it’s durable and looks good. Pine is another type of wood used to make fences because it’s cheaper and more durable. When choosing wood for your project, consider cost and quality.
Do plenty of research before choosing a fence design or material to ensure you get something that meets your needs and looks great. This way, you’ll have a long-lasting, beautiful home barrier. With this information, let’s discuss the pros and cons of building a wooden fence.
My garden’s timber fence was one of my best decisions. Wooden fences are cost-effective, easy to install, and beautiful. You don’t need any special tools or skills to install a timber fence—just an afternoon and a pack of free light globes. This fencing is also affordable. A well-maintained wooden fence can really improve your property’s appearance.
Wooden fences have some drawbacks. They need regular maintenance, which is time-consuming and expensive. Rotting posts along the fence line will eventually collapse the fence. Wood fences require more repairs than vinyl or metal ones due to weather damage.
Despite these drawbacks, I think wooden fences are worth it, especially if you live in a place where wood blends in well. Wooden fences are easy to build and last for years with proper care.
After discussing wooden fence pros and cons, let’s discuss timber safety. Safely building a fence takes time and money.
Wear gloves, goggles, and boots when building a timber fence. This prevents splinters and other injuries from saws and drills. Before building your fence, check for power lines.
Avoid overstressing the fence’s wood pieces. Secure each piece to its foundation and check for warping or rot during construction—replace it immediately. It may take longer, but it will save you money on repairs later.
Thus, take care of yourself and the timber fence materials. It will guarantee a long-lasting project. Next, we’ll discuss local fence-building regulations.
Building a timber fence on your property can provide you with privacy and peace of mind. But before you begin constructing, it’s important to understand the regulations in your area:
Building a fence requires knowledge of local restrictions, which vary. Some cities require setbacks between properties or bodies of water, while others don’t allow fences taller than four feet without a permit. Be aware of any local government-banned materials for environmental or aesthetic reasons. Knowing these details before construction begins saves time, money, and effort. These factors will ensure your fence meets all regulations, so you can enjoy it for years to come.
Professionals are hired to build timber fences. If you lack the skills or time to do it yourself, this is the best option. An experienced contractor will build your fence safely and correctly. They can also recommend materials and wood amounts.
Professionals know where and how to place each piece of wood to make it last longer and look better. They will also finish the job faster than a novice.
Building a timber fence with a professional has many advantages. This saves time and effort and ensures a great-looking fence. Overall, hiring an expert for your DIY project may be one of your best decisions.
Building a timber fence was easy and fun. Timber fences are cheaper than other fencing materials. Staining or painting your fence can extend its lifespan.
Weatherproofing my timber fence was crucial to its longevity. It takes more work, but your fence will last longer and look better for years.
My timber fence project went well. I saved money on materials and added an attractive, long-lasting garden feature. Anyone can build their own fence with the right tools and materials. By now, you already have the right ideas on how to build a timber fence.
How long will a wood fence last? The time and money required to build such a feature is understandable. When considering fencing options, many people are unsure about them.
Timber fences last 20 years or more with proper installation and maintenance. However, this depends on the type of wood, the local climate, and whether regular treatments were done to keep the wood healthy. For instance, cedar may be more weatherproof than other woods. Sealant or paint can also prevent rot and insect damage to your fence.
If you use quality materials and maintain them, your timber fence should last decades before needing replacement. It may seem daunting, but taking the time to ensure your investment pays off is worth it. Having such a lovely addition to your outdoor space is a bonus.
Weatherproofing a wooden fence is crucial to its longevity. Timber is susceptible to weathering, so it’s best to protect your investment. Fortunately, there are several effective ways to protect and maintain your timber fence.
When building or repairing your fence, use quality materials. Pressure-treated wood lasts longer and resists rot. Check your fence for warping or cracking caused by extreme temperatures or moisture buildup. Early detection often allows minor repairs.
Sealing your timber fence after installation or repair helps it withstand Mother Nature. This prevents the wood from absorbing water and rotting over time. It also protects the material from UV rays, which can fade and discolor it, reducing its aesthetic appeal and possibly weakening exposed areas where natural oils have been stripped away by sunlight.
By taking these precautions before installing your fence, you can rest assured that it won’t be damaged by the sun or rain. Your timber fence will outlast expectations, giving you years of enjoyment.
Building a timber fence is fun and rewarding, but there are additional costs. Include materials, labor, and other costs in your fence-building estimate.
Timber fences cost the most in materials. Posts, rails, panels, pickets, screws, nails, and other hardware are needed. These costs can add up quickly depending on your fence’s type and size. If you hire someone to build your fence, it could double the cost. Finally, permit and inspection fees may need to be included in your budget depending on local fencing regulations.
Building a timber fence on a budget is possible, but you should do your research first. Don’t ignore hidden costs—they could make or break your project. However, you’ll end up with a beautiful, sturdy, long-lasting piece—worth considering.
Timber fences can be stained or painted. Staining or painting your fence can give it a classy or vibrant look. There are several ways to create a beautiful fence, depending on the wood used.
Staining protects wood from water and UV rays while preserving its natural beauty. Painting gives colors that are brighter, but weathering and fading may require more maintenance. Both methods should be done carefully with high-quality materials for lasting results.
Before starting, consult experts to understand the steps and what materials will work best for your project. With proper preparation and application, you’ll have a beautiful, charming new addition to your property.
Timber fence construction is fun. It takes the right tools, materials, and some carpentry or construction knowledge. I recently built a timber fence, so I’ll tell you what tools you need.
First things first: hammer, drill, saws (circular or jigsaw), measuring tape, level, screws, nails, post hole digger, and shovel. Your design may require brackets, corner posts, and steel reinforcement rods. The right tools ensure a smooth, efficient job.
Working with drills and saws should never compromise safety. Even if you’re a woodworker, read all instructions before using. Gloves and goggles are also advised. Building a fence safely requires these precautions.
Thus, a timber fence requires hammers, post-hole diggers, and power tool safety. Build with everything ready.